

How to Create a macOS Big Sur ISO File Using Terminal - saylesasom1971
In that location is more one reason wherefore you may want to make a macOS Big Sur ISO file. Possibly you want to install macOS into virtual machines such as VMWare and Parallels Desktop for extensive testing. Peradventur you are willing to make an alternative installer media on an external hard drive. Whatever could be your reason for making a macOS Big Sur ISO file, you would be glad to know IT's possible to fine-tune a fully functional ISO file without having to use any ordinal-party puppet. If you are all set, Lashkar-e-Toiba me guide you through!
Make a macOS Big Sur ISO Filing cabinet Using Terminal App
So, how do you get an ISO single file on Mac? Thanks to the built-in app known as Fatal, you can make water a workable ISO file through the command line. For the folks who are wondering as to wherefore the entire process requires the need of Terminal surgery a third-party app, it is because the macOS installer covering is actually an .app file (and not a disk image).
It's worth pointing out that you can use the same process to create ISO file for the past generations of macOS like-minded macOS Catalina and Mojave as considerably. So, even if you want the file for the older generations of macOS, the following steps lav take you through. With that said, let's get going!
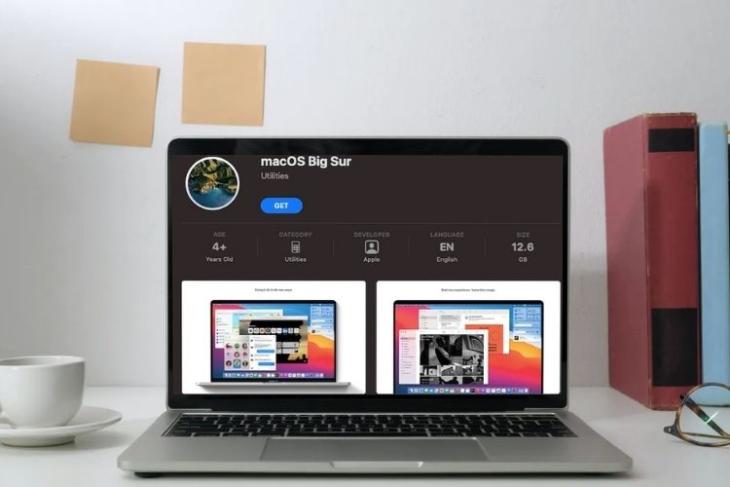
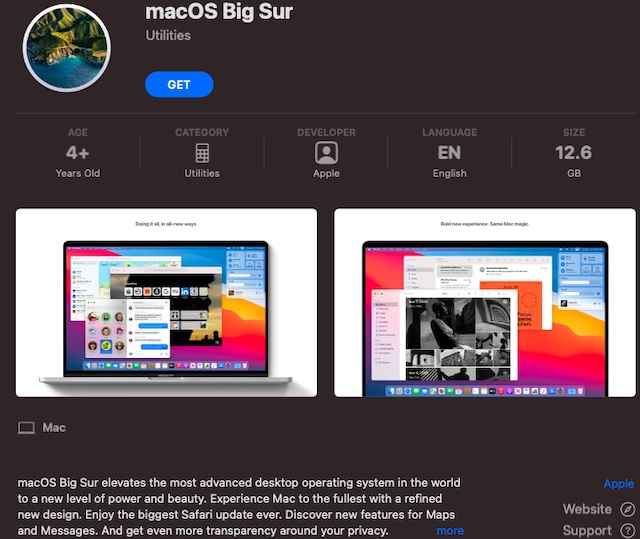
- To get started, head concluded to Mac App Store and download the installer app for macOS Bouffant Sur. Erst the macOS installer app (named as macOS Expectant Sur.app) is downloaded, you can find it inside the Applications folder.
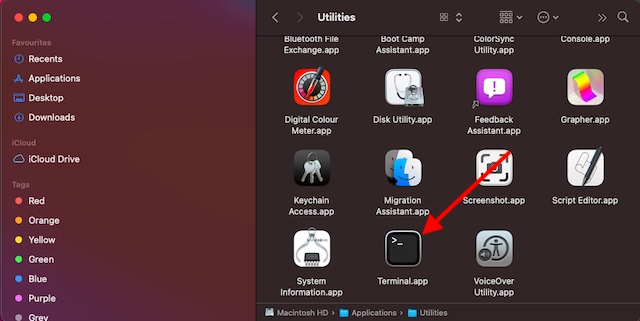
2. Now, open the Terminal app. You can launch information technology from the Applications > Utilities folder. Alternately, you can press Command+Space and search for the Terminal app to quickly find it.
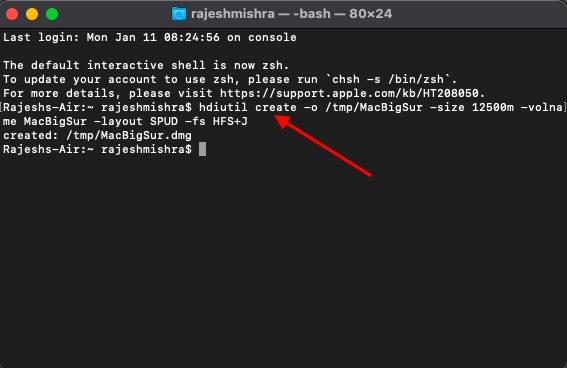
3. Future, it's time to create a pro tempore disk figure. Launch terminal and run the following bidding.
hdiutil create -o /tmp/MacBigSur -size 12500m -volname MacBigSur -layout SPUD -fs HFS+J
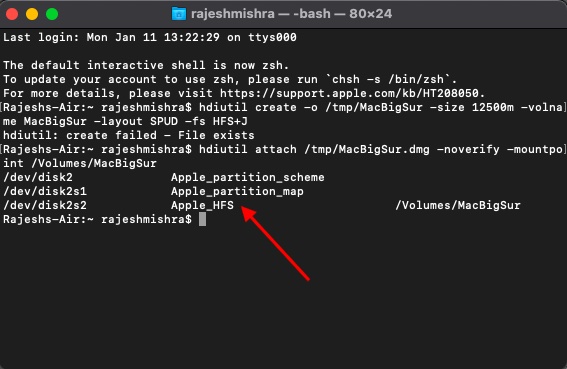
4. Next up, you need to mount the disk image:
hdiutil attach /tmp/MacBigSur.dmg -noverify -mountpoint /Volumes/MacBigSur
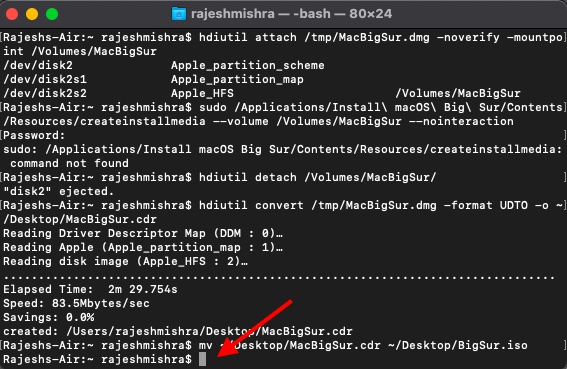
5. Awake next, copy the installer files to the phonograph record picture we own just created using the createinstallmedia utility which is part of the macOS Installer application.
sudo /Applications/Install\ macOS\ Whacking\ Sur/Contents/Resources/createinstallmedia --volume /Volumes/MacBigSur --nointeraction
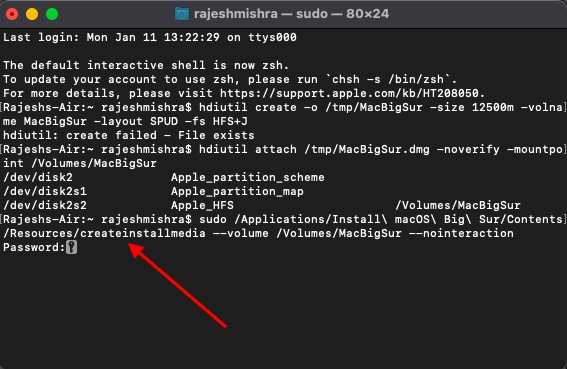
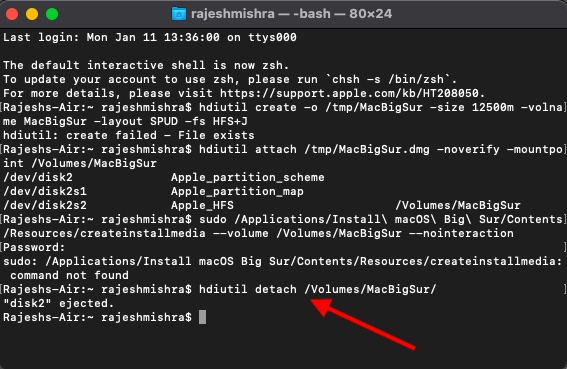
6. Now, press return and then type the admin parole to authenticate. Nowadays, you need to wait for some time until the installer is created. Erstwhile the process is completed, you will need to unmount the phonograph recording image book.
hdiutil detach /Volumes/MacBigSur/
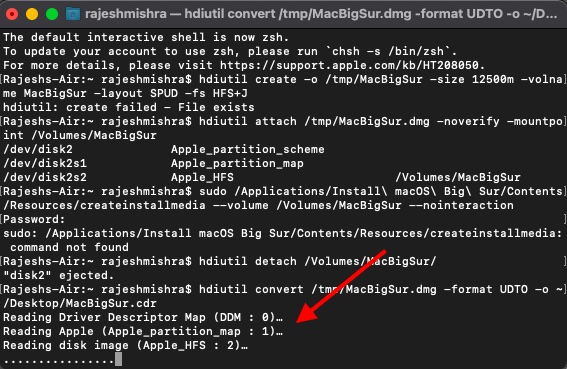
7. Next, convert the newly created macOS Insaller disk image file to an ISO/CDR file. Now, it leave evidenc up on the desktop.
hdiutil convert /tmp/MacBigSur.dmg -initialize UDTO -o ~/Desktop/MacBigSur.cdr
8. Next up, vary the file extension from .cdr to .iso.
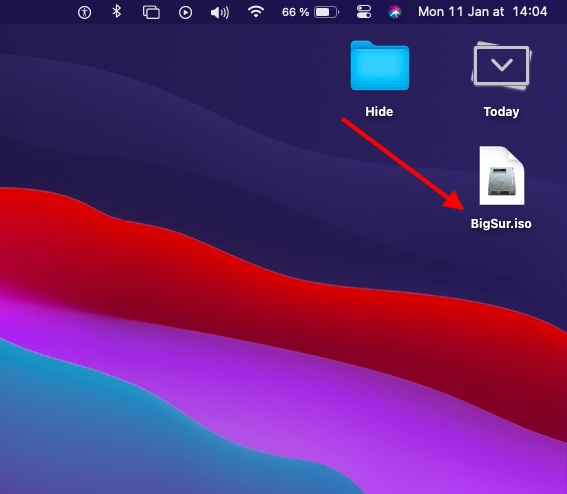
mendelevium ~/Background/MacBigSur.cdr ~/Desktop/BigSur.iso
That's all there is to it! You have successfully made a macOS Big Sur ISO single file (named as BigSur.iso) on your Mackintosh.
Create a macOS Big Sur ISO File with Terminal
So, that's how you can create a functional ISO file using the Terminal app on your Mac. It's genuine that the first political party app works reliably in making an ISO file as you assume't experience to look for third-party software program or even pogey out some bucks. As someone who heavily relies on Terminal for acquiring it done, I must say that you dismiss count on the app to satisfy the tax mostly.
Though it's also possible to convert dmg and CDR files to ISO with the help of Disk Secondary, the whole process doesn't feel straightforward. Therefore, I don't recommend it. By the way, hold any questions or feedback? Be sure to put your thoughts across connate to this topic. Also, don't forget to read our coverage of other articles on macOS Intense Sur, including our collection of best Big Tyre widgets, resolution battery debilitate issues along Big Sur, and Sir Thomas More.

Source: https://beebom.com/create-macos-big-sur-iso-file/
Posted by: saylesasom1971.blogspot.com
0 Response to "How to Create a macOS Big Sur ISO File Using Terminal - saylesasom1971"
Post a Comment